(This document was originally for 22.04 but 24.04 works exactly the same).
In order to quickly and efficiently deploy new Virtual Machines you can create premade templates which you can use a source to clone a new Virtual Machine from.
While Proxmox VE supports cloud-init that might just be overkill, and a lot of the premade images aren’t very user friendly with things such as forced use of SSH Public Key Authentication, or disabling the console and forcing the use of the serial terminal.
The problem with cloning the Virtual Machine is that it contains duplicate ID’s such as the machine ID, which will cause issues with DHCP as well as multiple servers using the same host keys.
Step 1 – Build Your Virtual Machine
First step is to create a virtual machine and configure the required hardware.
In my case I setup a UEFI machine, with q35 hardware, a single NIC, 4 cores, 8GB memory, attached a NIC to my test network and most of all importance, ticked the box for the Agent to be enabled.
I then mounted the Ubuntu Server ISO to the Virtual CD drive and powered on the VM. I followed a typical installation partitioning the drive how I’d like, and so on.
Once rebooted, I disconnected the ISO and SSH’d into the new Virtual Machine.
Step 2 – Update the Virtual Machine & Install Software
No point in creating a template that is more out of date than it needs to be, so just run apt and get the latest packages installed.
sudo apt update
sudo apt upgrade
Next we’ll install the Qemu Guest Agent which helps with things such as sending more statistics to Proxmox VE GUI as well as interactively shutting the Virtual Machine down from the Hypervisor.
sudo apt install qemu-guest-agent
sudo systemctl enable qemu-guest-agent
Since we’ll not be using a Cloud-init image here, we can turn off cloud-init completely by creating a blank file in the cloud directory.
sudo touch /etc/cloud/cloud-init.disabledNext we need to reset the machine-id file, this cannot simply just be deleted so we’ll truncate it’s length to zero bytes long.
sudo truncate -s 0 /etc/machine-idStep 3 – Prepare First Boot Script
We’ll create a systemd service which will run once the first time the system boots. This will then disable itself ensuring that it doesn’t delete the host keys once they’ve been changed.
sudo vim /etc/systemd/system/reset_ssh_host_keys.servicePaste the following content:
[Unit]
Description=Regenerate SSH host keys
Before=ssh.service
ConditionFileIsExecutable=/usr/bin/ssh-keygen

[Service]
Type=oneshot
ExecStartPre=-/bin/dd if=/dev/hwrng of=/dev/urandom count=1 bs=4096
ExecStartPre=-/bin/sh -c "/bin/rm -f -v /etc/ssh/ssh_host__key"
ExecStart=/usr/bin/ssh-keygen -A -v
ExecStartPost=/bin/systemctl disable reset_ssh_host_keys
ExecStartPost=/bin/apt update -y
ExecStartPost=/bin/apt upgrade -y
ExecStartPost=/sbin/reboot

[Install]
WantedBy=multi-user.target
Nexr we’ll reload systemd’s service list and enable the service (not start).
sudo systemctl daemon-reload
sudo systemctl enable reset_ssh_host_keys
Finally we clear up the history from bash so we get a nice clean Virtual Machine and power off.
cat /dev/null > ~/.bash_history && history -c && sudo poweroffStep 4 – Test Clone Your VM
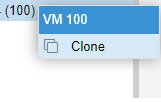
Next we’ll make a clone of this Virtual Machine and power it on to observe that it does what we expect.
You can right click the powered off Virtual Machine and choose Clone. Then power it on and make sure it boots up and then reboots itself shortly after once it completes its updates.
Step 5 – Done!
If everything went well you can now delete your test clone and convert your Virtual Machine to a template ready to be deployed at a moments notice.
Related Posts
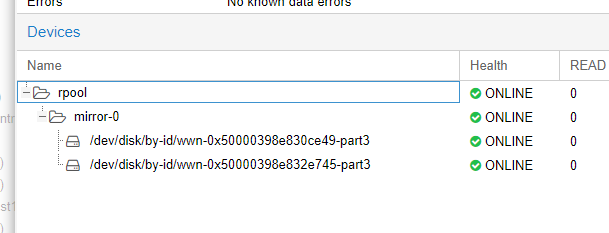
Replacing Proxmox Boot Drive with ZFS Mirror

Bypass Ubuntu Installation BitLocker check